Your AC stopped working. It is hot. You want someone on the phone immediately. That is understandable, and if your system has a problem that requires a technician, Gary Air will come out and fix it. But before you make that call, there are a handful of checks worth running first, because some of them resolve the problem entirely, and the ones that do not give the dispatcher exactly the information needed to send the right technician with the right parts on the first visit.
In this article, Rob Brooks, owner and veteran technician at Gary Air, walks through the complete pre-call self-triage sequence he recommends to every homeowner: what to check, in what order, what is safe to do yourself, and what the findings mean when you do call.
Here's what you need to know.
Keep reading to understand what a technician needs to know before they roll the truck, and why the homeowners who can provide it get faster, more accurate service.
Why what you check before calling matters
Rob Brooks has been on service calls that resolved in under a minute. He has also been on calls where the homeowner's description of what they observed before calling cut the diagnostic time in half and meant the technician arrived with the exact part needed to resolve the issue on the first visit.
The difference between those outcomes is not technical expertise. It is a short checklist that takes five to ten minutes and requires no tools.
Rob describes why that information is valuable from the dispatch side: "Beyond the initial checks, really what you want to tell an HVAC company is if there's air coming out of the system where you can actually feel air but it's hot, or if you have very loud noises coming from the outdoor unit. That starts to give us a picture of whether maybe it's a refrigerant problem or an electrical problem. That enables the HVAC company to try their best to send the right technician to the job the first time."
That picture matters operationally. A technician dispatched for a refrigerant issue carries different equipment and diagnostic tools than one dispatched for an electrical fault. Getting the dispatch right the first time is the difference between a same-day repair and a second visit.
Rob describes going out on a call himself during a busy summer stretch when the team was fully booked: "It was as simple as the breaker. I did a little bit of an assessment and realized that the breaker had just tripped, and that cuts off power to the HVAC system. That could have been as a result of a power surge or some issue in the power grid. It was a 30-second repair. If the customer had known to check the breaker, they wouldn't have had to call us."
That is not an isolated case. Tripped breakers, thermostats in the wrong mode, and float switch shutdowns from drain line backups together account for a significant share of service calls that homeowners could have resolved or at least diagnosed themselves in under ten minutes. The checklist below is designed around those scenarios specifically.
Step one: check the thermostat before anything else
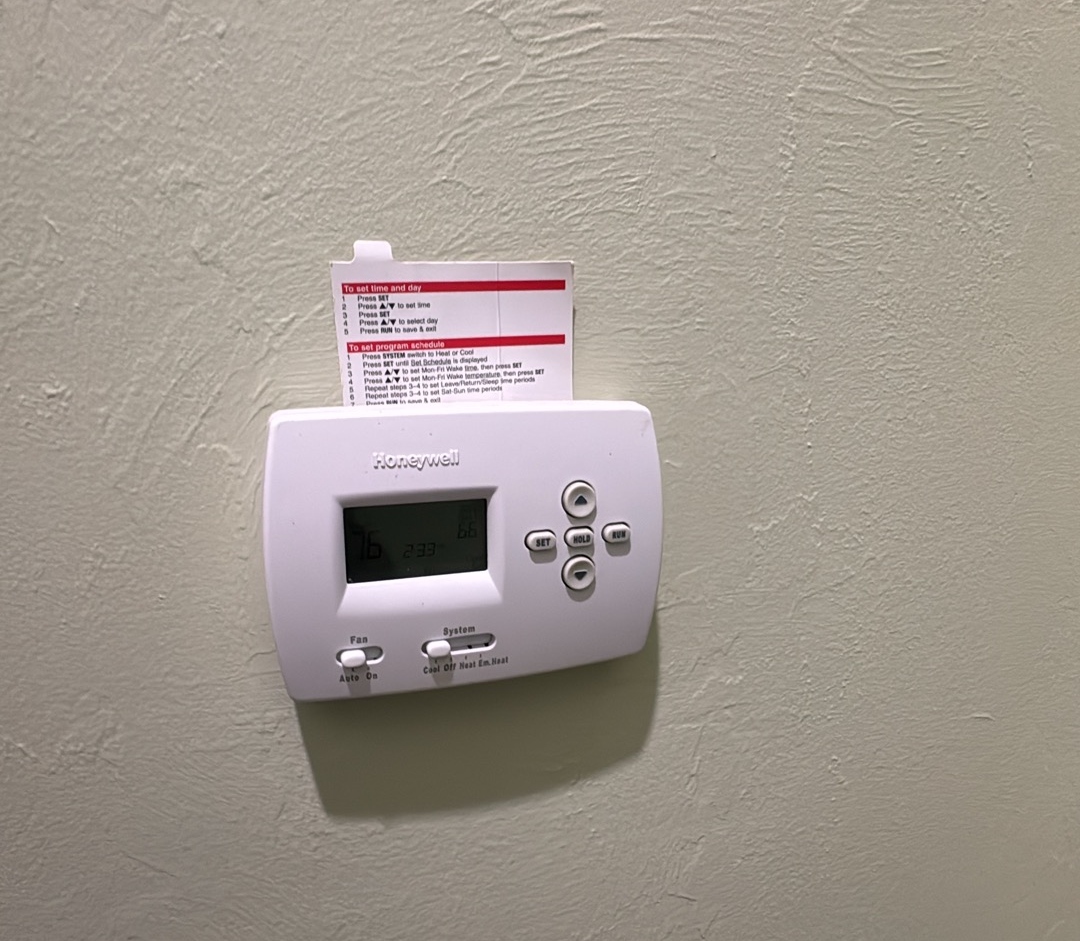
The thermostat is the correct first stop for any AC problem, and it is the one most homeowners skip in their urgency to confirm the system has actually failed.
Rob identifies thermostat misconfiguration as the thing homeowners almost never check but should: "Definitely the thermostat and whether or not they have it on heat versus cold, or the fan settings. Not all customers really understand how the thermostat works, and they should ask their HVAC technicians that come out and do maintenance on their home to give them a crash course in using a thermostat."
Work through these settings in order:
If any of these settings are wrong, correct them and wait five minutes before concluding anything. Some thermostats have a built-in delay of three to five minutes before the system responds to a new setpoint, particularly after a recent change or power interruption.
Rob describes a specific check that provides useful diagnostic information even when the thermostat appears to be set correctly: "Try switching between cool and heat to see if one mode works and the other doesn't."
If the system runs in heat mode but not cool mode, or vice versa, that narrows the diagnosis to the components specific to one mode, the reversing valve in a heat pump system, the cooling contactor, or the control signal for one circuit. That information is directly actionable for the technician and the dispatcher.
If neither mode produces any system response, the issue is upstream of the mode selection: a power problem, a blown fuse in the air handler, or a safety switch lockout. Move to the next step.
The AC thermostat repair issues that originate in the thermostat itself, as opposed to a setting error, typically present as the system not responding to any input rather than running in one mode but not another. If the thermostat screen is blank or unresponsive, check whether it takes batteries and whether they need replacing before assuming a wiring or board problem.
Step two: check the electrical panel
A tripped circuit breaker is the simplest external cause of a complete system shutdown and one of the most commonly overlooked. It requires no tools, no HVAC knowledge, and no access to the system itself.
The electrical panel in most Sarasota homes is either in a hallway, garage, utility room, or on an exterior wall. Open the panel door and look for a breaker that is in the middle position, neither fully on nor fully off, or that appears slightly out of alignment with the other breakers. Modern breakers trip to a middle position rather than flipping fully to off, which makes them easy to miss on a quick scan.
To reset: push the breaker firmly to the full off position first, then back to on. Do not just push it toward on from the middle position; the full cycle is required for the breaker to reset properly.
HVAC systems typically have two breakers: one for the air handler inside and one for the outdoor condenser unit. Check both. The breaker for the air handler is often labeled AHU or Air Handler. The breaker for the outdoor unit is often labeled AC or Condenser or simply by the amperage.
Rob notes a specific scenario that drives breaker trips in this market: "Heat strips draw substantially more current than cooling equipment, so a cold front that triggers heating demand can trip a breaker that held fine through summer." If you experienced a recent cold spell or if the system was running in heat mode before the failure, a tripped breaker for the heat strip circuit is a reasonable first hypothesis.
According to the U.S. Department of Energy, electric resistance heat strips in a heat pump system typically draw 2 to 5 times more current than the compressor circuit during cooling operation, which is why a breaker that holds reliably through a full summer cooling season can trip the first time heating demand is called in a cold snap.
Reset the breaker once. If it holds, monitor the system. If it trips again immediately or within a few minutes of the system starting, do not reset it a second time. A breaker that trips repeatedly is protecting against an underlying electrical fault, and resetting it repeatedly can cause damage. Note that it tripped and report it when you call.
Some air handlers contain a low-voltage fuse, typically a 3-amp or 5-amp automotive-style blade fuse, that protects the control board circuit. If the breakers are all correctly positioned and the air handler does not respond to thermostat input, a blown low-voltage fuse is worth checking if you are comfortable opening the air handler access panel. The fuse is typically in a holder near the control board and is labeled on the wiring diagram inside the panel.
A blown low-voltage fuse almost always indicates a wiring short somewhere in the low-voltage circuit, and simply replacing the fuse without finding the short will result in the new fuse blowing immediately. Report the blown fuse to the dispatcher when you call; it tells the technician to come prepared to trace a low-voltage fault.
Step three: check the condensate drain line
In Sarasota's climate, a backed-up condensate drain line is the single most common cause of a system that was running normally and then stopped without warning. The float switch that shuts the system off when water backs up is doing exactly what it is designed to do. The fix, in many cases, is clearing the blockage.
The condensate drain pan sits under the evaporator coil inside the air handler. In most Florida homes, the air handler is in a closet, garage, attic, or utility space. Open the access panel and look at the drain pan. If there is standing water in the pan, the drain line is backed up and the float switch has shut the system off.
Rob describes the simplest safe intervention: "If you have a shop vac, you can suck the water out and get your system back up and running while you're waiting for an HVAC company to come out and do maybe a deep clean or unclogging of the system."
If you have a wet/dry vacuum and can safely access the drain line or the pan, removing the standing water will often allow the float switch to reset and the system to restart. This is a temporary measure. The blockage that caused the backup is still in the drain line, and the system will shut off again, potentially within hours, if the line is not professionally cleaned.
The signs your AC is struggling with a blocked condensate line before a full shutdown often appear over one to two days: the system runs slightly longer than usual, indoor humidity is marginally elevated, or a musty smell develops near the air handler. Catching those indicators before the float switch activates is what the twice-yearly maintenance interval is designed to accomplish.
If there is no standing water in the pan and the system is still not running, the float switch may have activated from a prior backup that has partially drained. Look for residue or water marks around the pan that indicate recent overflow. In that case, the float switch may simply need to be manually reset, which involves locating the switch on the drain line, ensuring the line is clear, and pressing the reset button if one is present.
The temptation to treat a clogged HVAC drain line like a household drain and reach for a drain cleaner is understandable and should be resisted. Rob is specific about why: "Residue from harsh drain cleaners can remain in the drain line, get pulled back into the air handler when the blower runs, corrode components like coils, and potentially introduce chemicals into the air stream."
The safe homeowner option is a diluted hot vinegar solution, which inhibits organic growth without leaving residue that damages system components.
For a clog that does not clear with a wet/dry vacuum at the drain opening, professional cleaning with the right equipment is the correct path. The AC drain line maintenance approach that prevents most shutdowns is consistent flushing on a schedule that matches the Florida growth rate, not reactive treatment after the backup has already occurred.
Step four: listen and observe before you call
Once you have worked through the thermostat, breaker, and drain line checks, the most useful thing you can do before calling is to observe what the system is and is not doing. Two pieces of information are specifically valuable to the dispatcher.
Stand near the air handler and listen. Can you hear the blower motor running? Is air coming out of the supply vents? If the blower is running but the air is warm or only slightly cool, the system has power and the air handler is operational. The problem is downstream: either the outdoor unit is not running, there is a refrigerant issue, or the coil is restricted enough to prevent adequate heat transfer.
If the blower is not running and there is no air movement at all, the problem is either a power issue to the air handler, a blown fuse, a failed blower motor, or a control board fault. These are different diagnostic paths requiring different parts, and telling the dispatcher which one applies is directly useful.
A noisy blower that is running but producing unusual sounds, grinding, squealing, or a rhythmic thumping, is worth noting specifically. These sounds indicate different mechanical conditions and help the technician arrive with the right diagnostic approach.
Go outside and observe the condenser unit. Is the fan on top spinning? Can you hear the compressor running? If the indoor blower is running but the outdoor unit is completely quiet and the fan is not turning, the problem is specific to the outdoor circuit: either a tripped breaker for that circuit, a failed capacitor preventing the outdoor motor from starting, or a contactor that is not closing.
Rob identifies the capacitor as the most common single component failure during peak season: they provide the electrical charge that starts the outdoor fan motor and the compressor, and they degrade faster in Florida's heat than in any other climate.
According to the U.S. Environmental Protection Agency, air conditioning equipment failures are disproportionately concentrated during periods of peak outdoor temperature because sustained heat accelerates the degradation of electrochemical components, including capacitors, at a rate that cannot be predicted from calendar age alone.
A system where the indoor blower runs but the outdoor unit does not start is a strong indicator of a capacitor or contactor failure, both of which a stocked service van can address on the first visit.
The AC capacitor replacement process is not a DIY task: the capacitor stores a charge that can cause serious injury if the component is handled without the right knowledge and equipment, and wiring errors during replacement can damage the control board.
If the system is running, indoor and outdoor, but the house is not reaching the set temperature, checking the temperature split provides useful diagnostic data. Place a thermometer at the return air grille, where air enters the system, and at the nearest supply register, where conditioned air exits. In a properly functioning system, the supply air should be 18 to 20 degrees Fahrenheit cooler than the return air.
A split of 7 to 10 degrees indicates restricted airflow, most likely from a dirty evaporator coil or a clogged filter, or a refrigerant issue. A split of 14 to 16 degrees indicates borderline performance, worth flagging but not necessarily an emergency.
Reporting the measured split when you call gives the technician a quantitative starting point before they arrive. According to the U.S. Department of Energy's Building Technologies Office, a properly functioning residential air conditioner should produce a temperature difference of 15 to 20 degrees Fahrenheit between return and supply air; a consistently narrower split under normal load conditions is a reliable indicator of restricted airflow or reduced refrigerant charge that warrants professional evaluation.
A dirty evaporator coil producing a weak temperature split is one of the most common findings on service calls in this market and one of the most preventable with the right maintenance interval.
When to stop checking and call immediately
Some conditions warrant turning the system off and calling without completing the checklist. Do not attempt further diagnosis if you observe any of the following.
In all of these cases: set the thermostat to off, not just to a higher temperature. Turn off the relevant breakers if there are electrical odors or sounds. Then call.
What to say when you do call
After working through the checklist, you should be able to answer the following questions when you reach a dispatcher. Having these answers ready gets the right technician dispatched and reduces the time between the call and the repair.
Rob's summary of why this matters: "If there's air coming out of the system where you can actually feel air but it's hot, or if you have very loud noises coming from the outdoor unit, that gives us a picture of whether maybe it's a refrigerant problem or an electrical problem. That enables the HVAC company to try their best to send the right technician to the job the first time to ensure that they get service and get their system running as quickly as possible."
That is the goal of the checklist. Not to replace a technician, but to make the technician visit faster, more targeted, and more likely to result in a same-day repair.
The bigger picture: what most of these situations have in common
Working through actual service call patterns in Sarasota, the majority of calls that could have been avoided or resolved faster share one characteristic: a maintenance interval that had slipped past what this climate requires.
Drain line backups that trip float switches develop within four to five months of a professional cleaning in Florida's humidity. Capacitors that fail during peak season were degrading for months before the failure. Coils that are producing a 7-degree temperature split instead of 18 were accumulating restriction across the interval since the last service visit.
Rob's advice on what he wishes every Sarasota homeowner knew before peak summer: "Just spend the time, the effort, and the small monetary investment to have us come out and do a clean and tune of the system prior to it getting into super hot weather. A system that's fully tuned and cleaned prior to it getting hot has a really good chance of running right throughout the summer.
As soon as there's a high load on the system as a result of the summer, it breaks, and it puts customers in a situation where they have to wait extra time or spend extra money because everything's more expensive in the summer."
The HVAC air pressure checks and temperature split measurements in this guide are not substitutes for professional maintenance. They are diagnostic tools that help you understand what is happening when something goes wrong, and they are most useful when a well-maintained system gives you a stable baseline to compare against.
According to the U.S. Environmental Protection Agency, HVAC systems that are not regularly maintained become less effective at controlling indoor humidity and air quality, which compounds the discomfort of a system failure beyond the temperature alone. In Florida's climate, where humidity control is as important as temperature control, that degradation is felt faster and more acutely than in drier markets.
Conclusion
The five minutes you spend on this checklist before calling have one of two outcomes. Either you find something you can fix yourself, a tripped breaker, a thermostat in the wrong mode, a float switch that resets once the drain pan is cleared, and avoid the service call entirely.
Or you arrive at the call with a clear description of what the system is and is not doing, which gets you the right technician faster and reduces the chance of a second visit.
Neither outcome requires technical training. It requires knowing what to look at, in what order, and what to report when you call.
The homeowners who handle summer breakdowns the fastest in Sarasota are not the ones with the newest systems. They are the ones who know what to check first, can describe what they see in terms a dispatcher can use, and have a service relationship with a company that can act on that information and get the right person through the door the same day.
If you have worked through the checklist and need service, or if you want to get ahead of this summer with a maintenance visit before peak season, contact Gary Air.
As a locally owned, veteran-operated company serving Sarasota, Bradenton, and the surrounding coastal communities, Gary Air dispatches experienced technicians in stocked vans, with the goal of resolving your issue on the first visit.